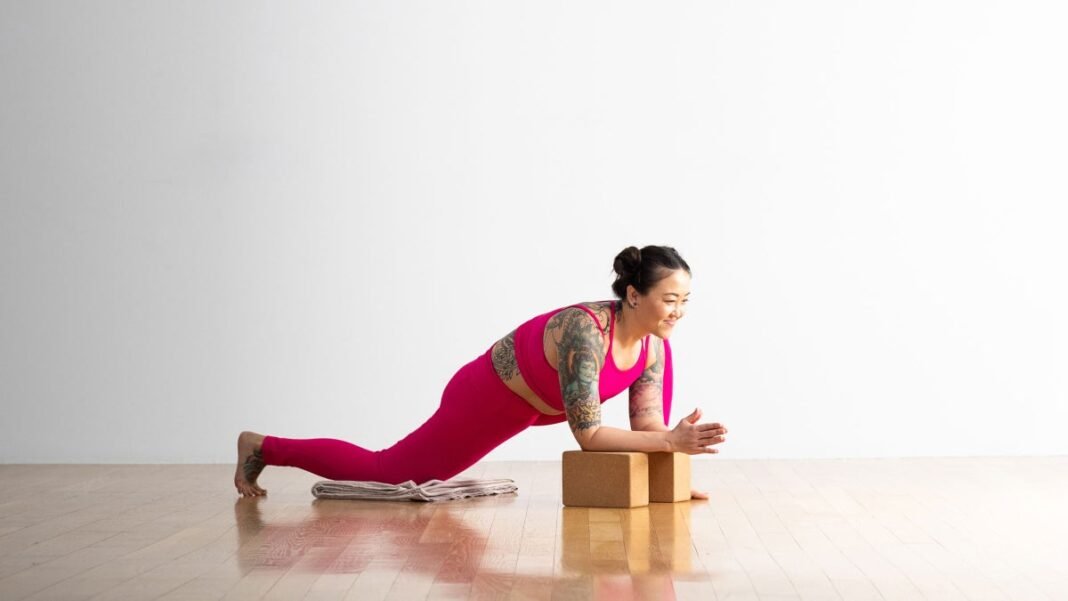
“], “filter”: { “nextExceptions”: “img, blockquote, div”, “nextContainsExceptions”: “img, blockquote, a.btn, a.o-button”} }”>
For many of us, tight hip flexors rank right up there with back and knee pain when it comes to everyday aches and pains. The proof? Hip flexor stretches are among the most requested moves in yoga classes.
Lifestyle has a lot to do with it—sitting for long periods leaves your hip flexors in prolonged contraction, which tightens your hip flexors and weakens your glutes. Over time, that tightness can lead to a reduced range of motion in your hips.
What Are Hip Flexors?
“Hip flexors” is the umbrella term for a group of muscles surrounding your hip joints. They include the iliacus, psoas, pectineus, rectus femoris, and sartorius.
Many yoga poses act as hip flexor stretches to lengthen your hip muscles and prevent pesky muscle stiffness. Practicing hip flexor stretches can also reduce lower back pain and improve hip mobility. Plus, these yoga poses just feel good.
6 Hip Flexor Stretches to Add to Your Yoga Practice
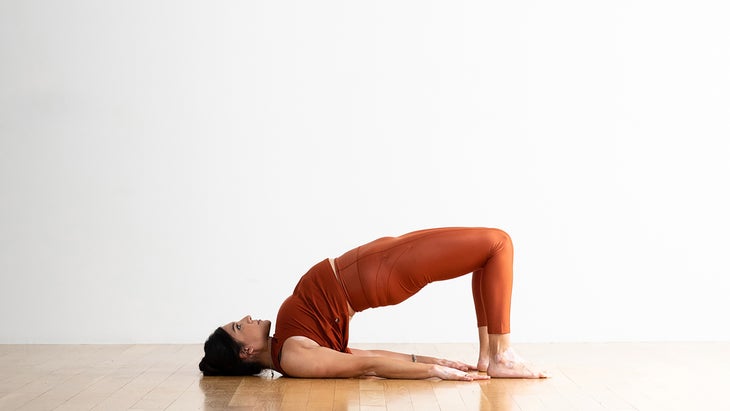
1. Bridge Pose (Setu Bandha Sarvangasana)
This pose not only stretches your hip flexor muscles, but it builds strength in your core. For a more restorative version of Bridge Pose, rest your sacrum (the flat, triangular-shaped bone at the base of your spine) on a block, bolster, or some stacked pillows as you pause for several breaths.
How to:
- Lie on your back with your knees bent and feet on the mat, heels as close to your sitting bones as possible. Rest your arms alongside your body, palms facing down.
- Exhale and press your feet and arms into the mat as you lift your hips until your thighs are about parallel to the floor or until you feel a stretch in your hips. Keep your thighs and feet parallel. If you like, clasp your hands underneath your back, press your pinkie fingers into the mat, and shimmy your upper arms beneath you.
- Push your knees forward while lengthening your tailbone toward the backs of your knees.
- Lift your chin slightly. Continue to push into your feet and arms to help lift your hips and chest.
- On an exhalation, slowly lower yourself onto the mat, starting with your upper back.
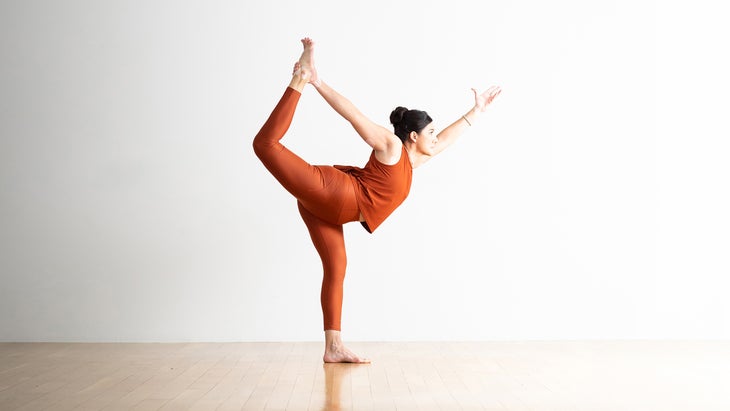
2. Lord of the Dance Pose (Natarajasana)
Also known as Dancer Pose, Lord of the Dance Pose targets a few different muscle groups at once. Your hip flexor and shoulder muscles experience a stretch, which can be modulated depending on the position of your leg. Plus, Lord of the Dance Pose practices your balancing skills.
How to:
- Stand in Mountain Pose (Tadasana). Shift your weight onto your right foot. Bend your left knee and lift your left heel toward your left buttock.
- Keep your gaze focused straight ahead as you reach your left hand behind you and grasp your outer left foot or ankle. Press your foot away from you toward the wall behind you. If you can’t reach your foot, use a strap.
- Reach your right arm forward, keeping it parallel to the floor. For a more intense stretch, you can lift your leg higher and push your foot away farther For a gentler stretch, keep your left thigh low with your knee pointing down toward the mat.
- When you’re ready to release, come out of the pose as slowly and steadily as you came into it. Switch sides.
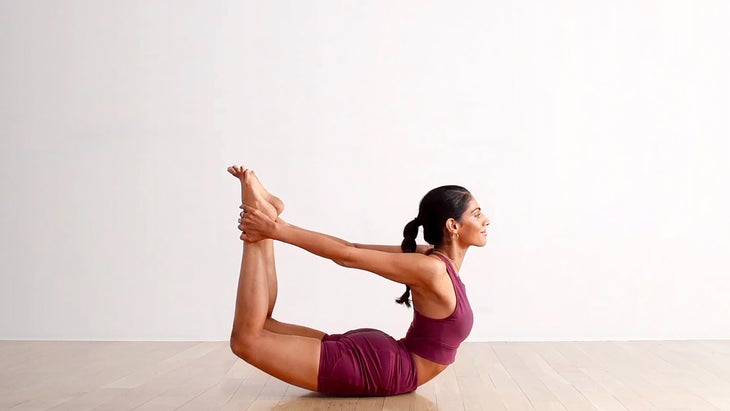
3. Bow Pose (Dhanurasana)
This pose stretches your hip muscles as you open the front of your body. Bow Pose can also improve your posture, which might alleviate tightness in your hip flexors.
How to:
- Lie on your belly with your legs hip-width apart and your palms on the mat beneath your shoulders. Press your hands into the mat to lift your head and chest. Roll your shoulders back.
- Bend your knees and bring your heels toward your buttocks. Reaching back with both arms at the same time, take hold of your outer ankles. Keep drawing your shoulders back. If you can’t reach your ankles, use a strap. Press your feet into your hands toward the wall behind you. Breathe here. Switch sides.
Variation: For a less intense stretch, come into Half Bow Pose by keeping your left leg straight and your left hand pressed into the mat. Bend your right leg into your buttock and reach back with your right arm to clasp your right ankle. If it’s more comfortable, you can keep your right thigh pressing into the mat instead of lifting it. Switch sides.
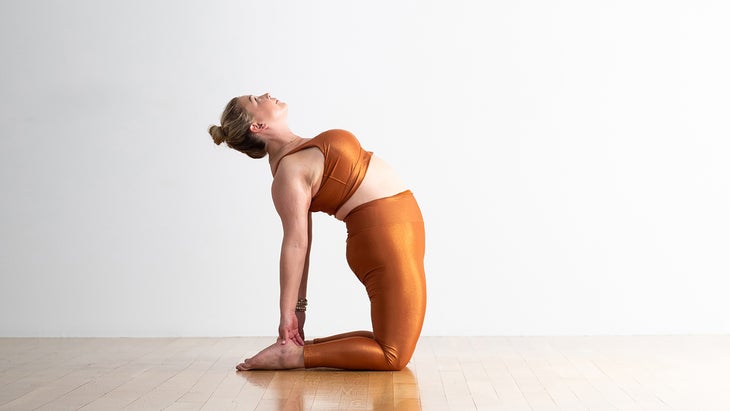
4. Camel Pose (Ustrasana)
In addition to stretching your hip flexors, Camel Pose stretches your abdomen, chest, shoulders, and thighs. It’s also a strengthening exercise for your low back and glutes, which can help improve hip stability.
How to:
- Kneel on your mat with knees hip-width apart and your hips directly over your knees. Press your shins and the tops of your feet into the mat.
- Place your hands on your hips, with your thumbs on your sacrum. Internally rotate your thighs by trying to turn your inner thighs toward each other.
- Inhale and reach your tailbone toward your knees, lift your sternum, and draw your elbows toward each other.
- Reach your hands behind you and try to rest your fingertips on your heels. For a less intense stretch, tuck your toes to lift your heels or keep your hands on your low back and expand your rib cage.
- You can keep your chin slightly tucked or, if it’s comfortable, let your head hang back.
- Push your thighs forward toward the wall in front of you. Breathe here.
- To exit the posture, bring your hands to your hips and press down through your shins as you slowly lift your chest.
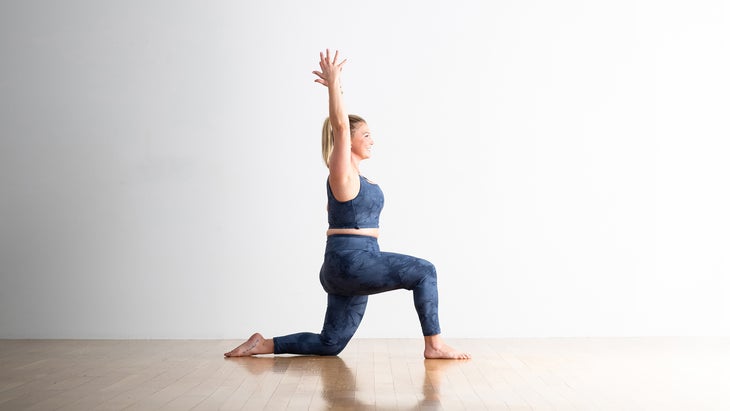
5. Low Lunge (Anjaneyasana)
Your thighs and the hip muscles on your back leg experience a stretch in Low Lunge , while the glutes on your front leg contract and build strength. Strong glute muscles help stabilize your lower body and take pressure off your hip flexors.
How to:
- From hands and knees or Downward-Facing Dog, step your right foot forward between your hands. Lower your left knee to the mat.
- Slide your left foot back until you feel a comfortable stretch along the front of your thigh. Untuck your back toes.
- Inhale and lift your arms alongside your ears. Draw your tailbone down toward the mat as you lift your chest away from your hips to create lengthening along your back. Breathe here.
- Bring your hands to the mat and switch sides.
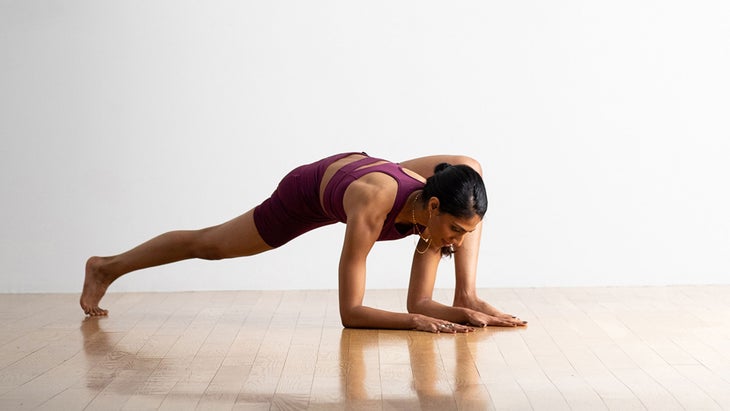
6. Lizard Pose (Utthan Pristhasana)
This pose stretches your outer hip (adductor) muscles, your hamstrings, as well as your hip flexors. Lizard Pose can also help relieve low back pain for those with conditions like sciatica, or for those who simply have low back tightness as a result of sitting.
How to:
- Come into Low Lunge with your left foot forward. Place both hands on the mat to the inside of your left foot.
- Tuck your right toes, lift your right knee, and reach your right heel toward the back wall. For a more intense stretch, lower your forearms onto the mat.
- Press your front knee into your shoulder and press your shoulder into your knee. Breathe here. To release, simply lower your lifted knee to the mat and return to Low Lunge. Switch sides.
This article has been updated. Originally published May 1, 2o21.

