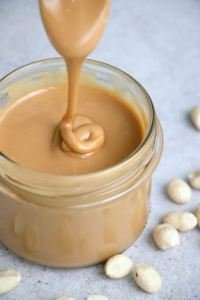
Almond butter is a versatile and delicious spread that not only adds flavor to your meals but also provides a healthy dose of nutrients. While store-bought almond butter is readily available, making your own at home can be a rewarding experience. Not only does it allow you to control the ingredients, but it also guarantees a fresh and natural flavor. In this blog post, we’ll guide you through the simple process of creating your own easy homemade almond butter.

Ingredients You’ll Need
To make homemade almond butter, you’ll only need one ingredient – almonds! Optionally, you can add a pinch of salt, honey, or maple syrup for flavor, but these are entirely optional. Here’s a quick rundown of what you’ll need:
- 2 cups of raw almonds
- Optional: 1/4 teaspoon of salt
- Optional: 1-2 tablespoons of honey or maple syrup for sweetness
Equipment Required
The equipment you’ll need for this recipe is minimal:
- Food processor or high-speed blender
- Rubber spatula
- Airtight container for storage
Instructions
- Roasting the Almonds (Optional)Preheat your oven to 350°F (175°C). Spread the raw almonds evenly on a baking sheet and roast them for 10-12 minutes. Roasting the almonds adds depth to the flavor of your almond butter, but it’s entirely optional. If you prefer a raw almond butter, you can skip this step.
- Blending the Almonds: Once the almonds have cooled (if you roasted them), transfer them to your food processor or high-speed blender. You can add a pinch of salt at this stage to enhance the flavor.
- Blend, Blend, Blend: Start blending the almonds at a low speed, gradually increasing it to high. You’ll notice the almonds go through several stages: crushed almonds, a coarse meal, and finally, almond butter. Be patient; blending may take 10-15 minutes for the magic to happen. Remember to scrape down the sides of the processor or blender with a spatula to ensure even blending.
- Adjusting the Consistency: You can decide on the texture of your almond butter. For creamier almond butter, continue blending until it reaches your desired consistency. If you prefer a chunkier almond butter, you can stop blending earlier.
- Sweetening (Optional): If you’d like to add some sweetness, drizzle in honey or maple syrup and blend for another minute. This step is entirely customizable to your taste.
- Store: Transfer your homemade almond butter to an airtight container. It will stay fresh in the refrigerator for up to two weeks, although it’s unlikely to last that long once you taste it!
Ways to Enjoy Homemade Almond Butter
- Spread it on whole-grain toast or rice cakes.
- Use it as a dip for fresh fruit like apple slices or celery sticks.
- Add a dollop to your morning oatmeal or yogurt.
- Incorporate it into smoothies for added creaminess and flavor.
- Make almond butter and banana sandwiches for a quick, nutritious snack.

Making homemade almond butter is easy and allows you to enjoy a fresh spread that can be tailored to your taste. With just a few simple steps and a handful of ingredients, you can whip up a batch of creamy or chunky almond butter that’s perfect for spreading, dipping, or adding to your favorite recipes. Give it a try, and you’ll never want to go back to store-bought almond butter again!

