“], “filter”: { “nextExceptions”: “img, blockquote, div”, “nextContainsExceptions”: “img, blockquote, a.btn, a.o-button”} }”>
According to the National Institutes of Health, 80 percent of Americans will experience lower back pain at some point during their lives. Your lower back is designed to stabilize and support your every movement, whether you’re walking, running, lifting, carrying, or doing just about anything. It’s no surprise that lower back pain is so common. When it’s out of whack, your back feels awful, your everyday life seems hijacked, and your mood plummets. Practicing yoga for lower back pain can sometimes help.
The Anatomy of Lower Back Pain
Your lower back consists of the five lumbar vertebrae at the bottom of your spine known as L1 to L5. Compared to the rest of your spine, the lumbar vertebrae are largest as they help support your upper and lower body. When your lower back is functioning optimally, these vertebrae allow you to twist and move your torso as they protect your spinal cord.
The lumbar region also contains a complex network of ligaments, muscles, and tendons that helps your vertebrae handle high stress and heavy loads.
What Causes Lower Back Pain?
There are several potential issues that can cause lower back pain. A bulging disk can happen when the cushioning between your vertebrae is compressed and can no longer do its job properly. A herniated disk can create pressure and cause pinched nerves. Osteoarthritis can also play a role.
Outside of medical issues, lumbar pain can be a symptom of a strain or tear that occurred as a result of weakened muscles. A major cause of this is prolonged sitting or standing. The more you sit, the less you use your stabilizing muscles, causing them to weaken and have difficulty doing their job when you need them. When your muscles are weak, lower back pain can result from even the simplest actions, including picking up something heavy or twisting the wrong way as you get into your car.
What We Know About Yoga for Lower Back Pain
How you practice yoga for back pain—and whether or not you should—depends largely on the cause of your back pain. Certain poses that might bring relief to someone with weakened back muscles might aggravate someone who has a herniated disk. It’s essential that you consult with your healthcare professional to discern the cause of your issue prior to practicing yoga for back pain.
It’s essential to understand that practicing yoga for back pain can rarely correct the cause of your back pain. It can, however, help relax tight muscles and strengthen weak muscles which may ease the symptom of pain. A considerable number of research studies also indicate that practicing breathwork and releasing tension, as you do when practicing yoga, can enhance mobility and can make a small to moderate improvement in the perceived intensity of pain. According to research conducted by the National Institutes of Health’s National Center for Complementary and Integrative Health, 29 percent of Americans relied on yoga to help manage pain in 2022. That’s an increase of 18 percent in the last two decades.
8 Yoga Poses for Lower Back Pain
Take your time getting into each pose. If any particular shape is uncomfortable, slowly make your way out of the pose and try a different one. Not every yoga pose for back pain will work for everyone. Trust your body and focus on the poses that help you experience relief.
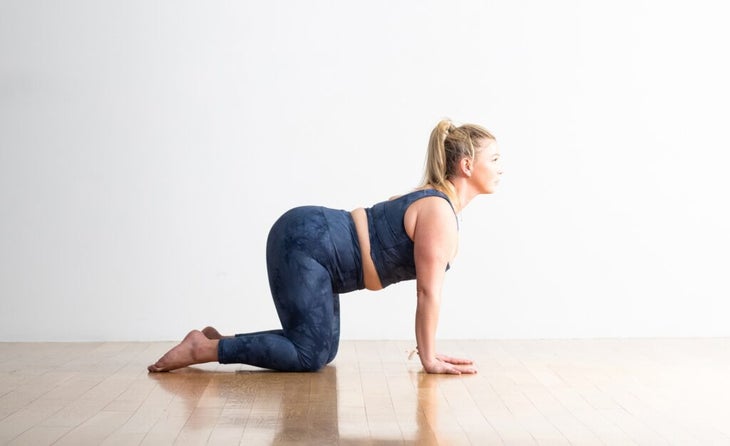
1. Cat-Cow Pose
Cat-Cow is a slow, simple stretch for your back, hips, chest, and shoulders. Linger in any part of the pose that feels good as long as you like.
How to: Start on your hands and knees. Make sure your knees are set directly below your hips and your wrists, elbows, and shoulders are stacked. As you inhale, lift your sitting bones and chest toward the ceiling, allowing your belly to sink toward the floor and your back to arch in Cow Pose.
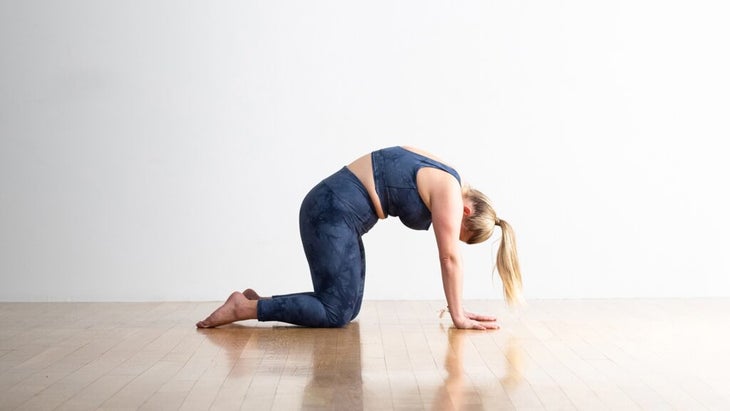
As you exhale, round your back and let your head hang in Cat Pose. Repeat as many times as you desire, following the pace of your breath.
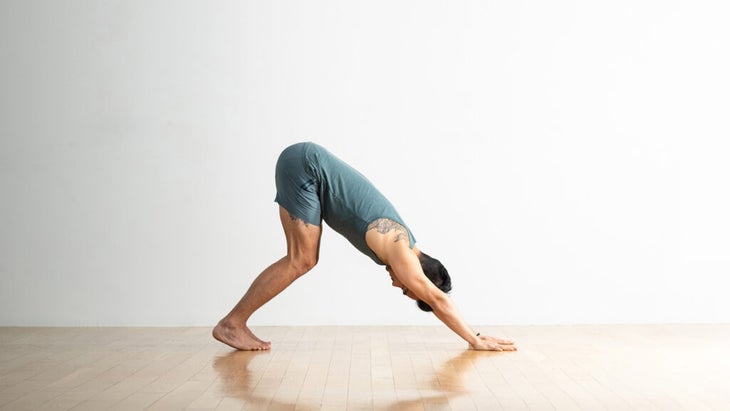
2. Downward-Facing Dog Pose (Adho Mukha Svanasana)
This iconic yoga pose lengthens and strengthens your back body and can bring relief to your shoulders, back, hamstrings, and more.
How to: Start on your hands and knees in Tabletop. Curl your toes under, press into your shoulders, and lift your hips up and back toward the wall behind you where it meets the ceiling in Downward-Facing Dog. Press down firmly through your knuckles and try to turn the creases of your elbows toward the front of the room.
If you feel a strain in your hamstrings or lower back, try bending your knees slightly. You want a straight line from your wrists to your shoulders to your hips. Glance back at your feet to make sure they are hip-width apart. Let your head hang heavy so there is no tension in your neck. Remember to breathe. When you’re ready, lower your knees and stay there or sink back into Child’s Pose.
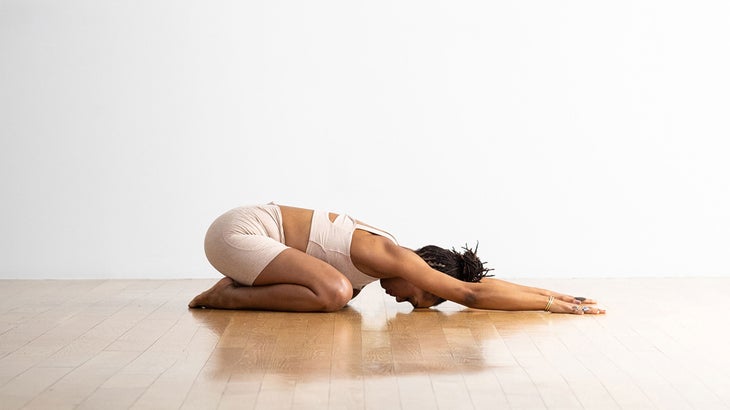
3. Child’s Pose (Balasana)
Child’s Pose provides a great stretch for your back and hips and helps calm your nervous system. Try to focus on slowing your breath and relaxing your shoulders and legs.
How to: Kneel on the floor. (You can slide a folded blanket beneath you for comfort.) Touch your big toes together and sit on your heels, then separate your knees about as wide as your hips. Exhale and bring your chest forward between your thighs. Lengthen your tailbone away from the back of the pelvis while you lift the base of your skull away from the back of your neck. Rest your forehead on the mat, a pillow, or a folded blanket. Stretch your arms forward with your palms down and fingers spread wide. Rest here for anywhere from a few breaths to a few minutes.
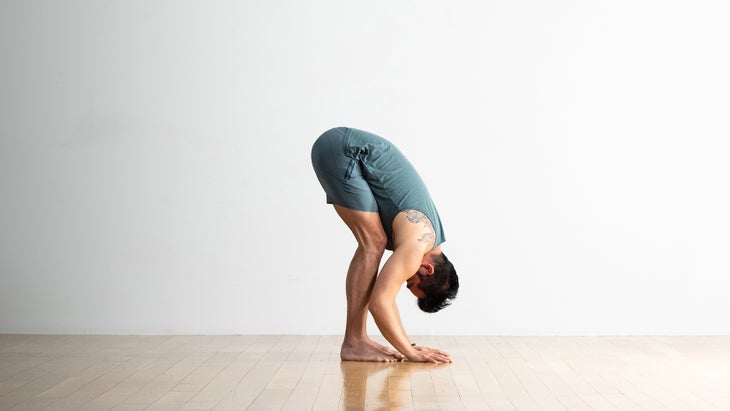
4. Standing Forward Bend (Uttanasana)
This yoga pose for lower back pain may seem exceptionally basic but it can bring profound relief. It stretches your entire back body, from your calves to your neck—including, of course, your lower back.
How to: Stand with your feet hip-distance apart or wider and bend forward at your hips. Bring your palms or fingertips to the floor slightly in front of or beside your feet or rest them on blocks or stacks of books. If you prefer, cross your forearms and hold opposite elbows. Press your heels firmly into the floor and lift your sitting bones toward the ceiling. If you can, turn your inner thighs further inward toward the wall behind you. With each inhale, lift your body slightly. With each exhale, release into your Standing Forward Bend a little more. Let your head hang and release your neck. Breathe here.
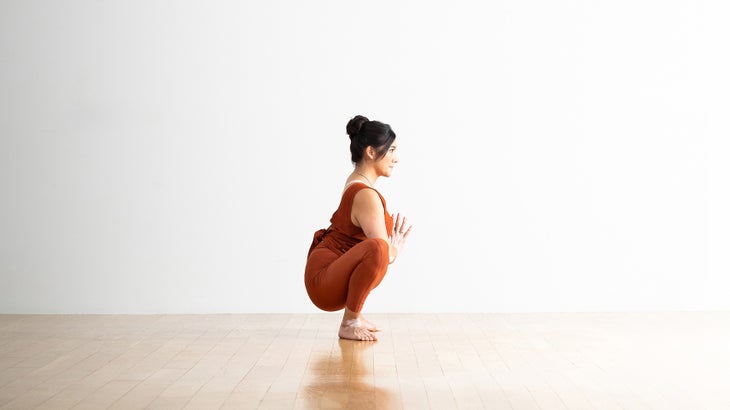
5. Squat (Malasana)
Garland Pose stretches just about everything around your lower back—quadriceps, groin, hips, and torso—as well as strengthens your ankles.
How to: Squat with your feet as close together as possible. Keep your heels grounded on the floor or roll your mat or a towel and slide it beneath your feet so your heels have support. Bring your thighs out toward the side and lean slightly forward. Press your elbows against your inner knees in a Squat, and press your elbows into your thighs and your thighs into your elbows. Bring your palms to together in prayer hands and lengthen along your back. Breathe here for 30 to 60 seconds.
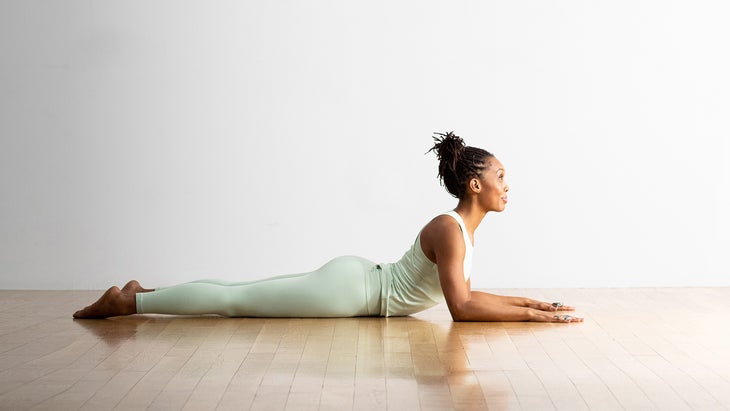
6. Sphinx Pose
This gentle backbend, named Sphinx for obvious reasons, is terrific for beginners. It’s considered a passive backbend and you can easily adjust the intensity by sliding your forearms more forward or leaning your upper body on pillows for support.
How to: Lie on your belly with your legs hip-distance apart. Come onto your forearms with your elbows under your shoulders and your forearms parallel to each other. Reach your tailbone toward your heels. Roll your outer thighs toward the floor. Inhale and lift your upper torso and head away from the floor into a mild backbend. This helps create more space in your lower back. Continue lengthening as you move into this pose to protect your lower back. Subtly draw your lower belly away from the floor. Stay here for 5-10 breaths. If this feels too intense, stack your hands on top of one another, lower your chest toward the mat, and rest your forehead on the back of your top hand. Repeat if you’d like.
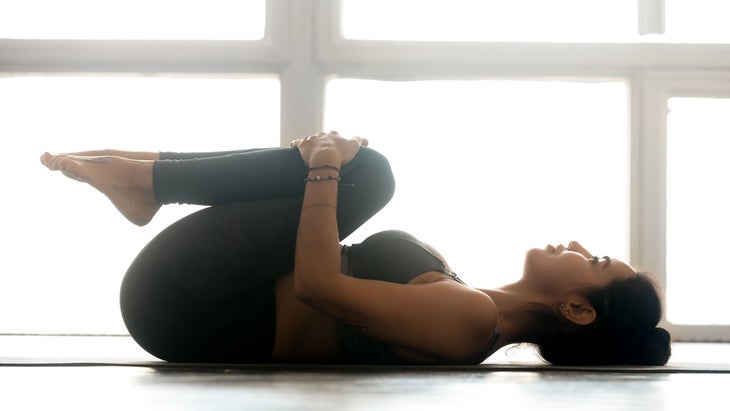
7. Knees-to-Chest Pose (Apanasana)
Knees-to-Chest Pose stretches and relaxes your lower back, which can reduce lower back pain.
How to: Make your way onto your back. Bend your knees and lift your feet off the floor, one at a time, bringing your knees as close to your chest as is comfortable. Place both hands on your shins or the backs of your thighs as you hug your knees to your chest. You can rock gently from side-to-side to give your lower back a massage or stay still. Stay here for as long as you’d like, then release your feet back to the mat and rest, with your knees bent and your feet hip-distance apart or wider.
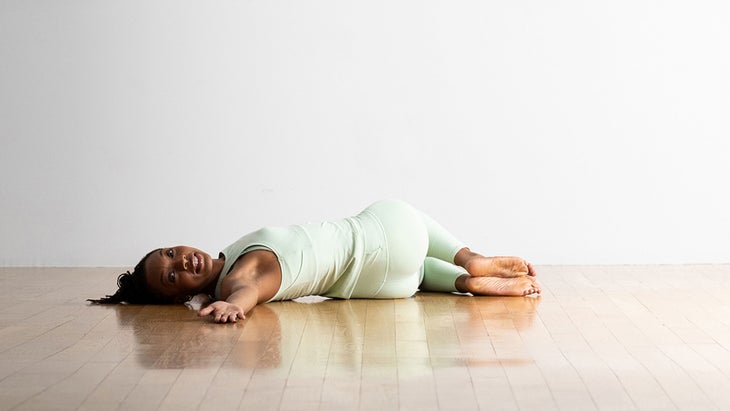
8. Reclining Spinal Twist (Supta Matsyendrasana)
A reclining spinal twist stretches your glutes and back muscles while lengthening and relaxing your spine. However, twisting can sometimes irritate an inflamed lower back, so if you experience any pain, slowly come out of the stretch.
How to: Lie on your back and reach your arms straight out to the sides at shoulder level. Bend your knees and inhale as you lift your feet off the floor, bringing your knees over your hips to create a right angle with your legs if that’s comfortable for you. Exhale and let your knees fall to your left. Keep your shoulders on the mat. Your left hip will lift as you twist to the right. You can turn your head to the right if that doesn’t feel uncomfortable. Breathe here for 1 to 2 minutes. Bring your legs back to center and switch sides.
Learn more about how yoga can transform your everyday life and enhance your connection to your body, mind, and soul by subscribing to our newsletter!This article has been updated. Originally published August 3, 2021.

