“], “filter”: { “nextExceptions”: “img, blockquote, div”, “nextContainsExceptions”: “img, blockquote, a.btn, a.o-button”} }”>
Some situations in life require you to figure out how to make things work despite discomfort. Paying bills. Communicating in relationships. Sitting through endless work meetings. But cringing during yoga class because you experience lower back pain doesn’t need to be one of those situations.
Studies estimate that more than 80 percent of Americans will suffer from lower back pain at some point in life. Given this statistic, you might expect more people to seek out modifications for yoga poses to alleviate lower back pain. Yet many yoga teachers will tell you that they only learn students are uncomfortable when they see grimaces.
The last thing your yoga practice should create is suffering. Consult with your primary care physician if you experience low back pain and obtain their clearance prior to continuing your yoga practice. Then try the following adjustments, which can bring relief to some of the most commonly practiced yoga poses that strain your lower back. Rest assured, most of these can be practiced subtly so you can continue to practice with the rest of class.
Start with these modifications and then explore other ways to minimize lower back pain during your practice until you find something that addresses your unique body and needs.
7 ways to practice common yoga poses if you experience lower back pain
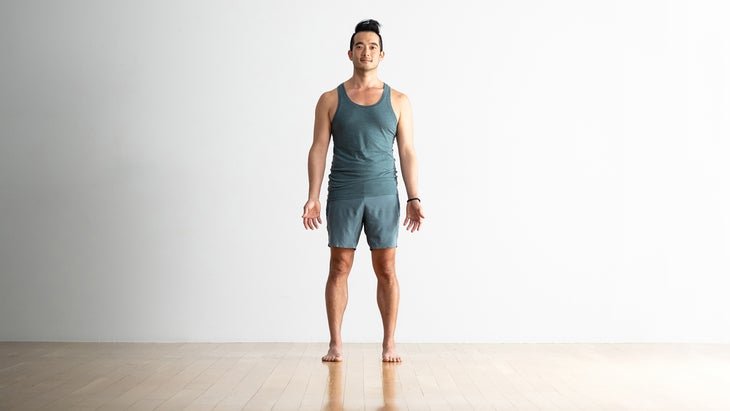
Tadasana (Mountain Pose)
Why you need to adjust the pose: The traditional cue for this pose is to bring your big toes to touch. However, that alignment places pressure on your low back, especially if you have inflamed muscles in that region. Taking your feet apart creates more space in the entire pelvic region and creates less tension in your lower back.
How to adjust the pose: Stand with your feet at least a couple inches or even hip-distance apart. Let your weight distribute evenly between your feet. Relax your hands at your sides, palms facing forward. Breathe.
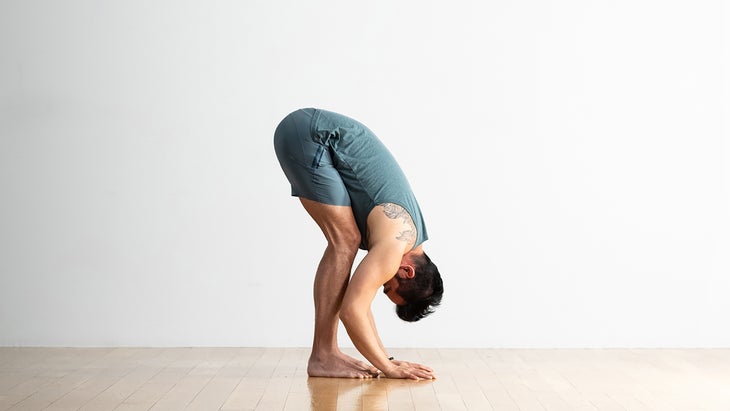
Uttanasana (Standing Forward Bend)
Why you need to adjust the pose: This forward bend exerts pressure on your lower back, especially if you have tight hamstrings or the round of your back remains higher than your hips as you bend.
How to adjust the pose: Stand with your feet hip-distance apart or a little wider. Hinge at your hips to fold forward and bend your knees as much as needed to be comfortable. Relax your hands to the mat or take blocks beneath them. Breathe.
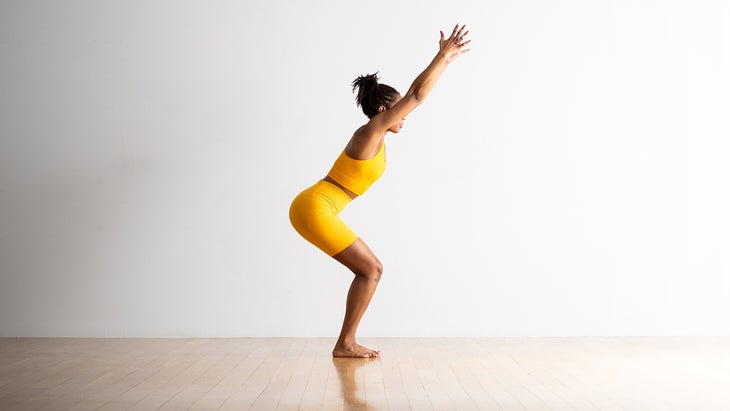
Utkatasana (Chair Pose)
Why you need to adjust the pose: Similar to Tadasana (Mountain Pose), the traditional cue for this standing pose is to bring your big toes to touch. Taking your feet apart creates more space in the entire pelvic region and, as a result, places less strain on your lower back.
How to adjust the pose: Stand with your feet at least a couple inches or even hip-distance apart. Let your weight distribute evenly between your feet. Reach your arms alongside your ears, palms facing one another. Engage your abdominals so you don’t create a backbend. Breathe.
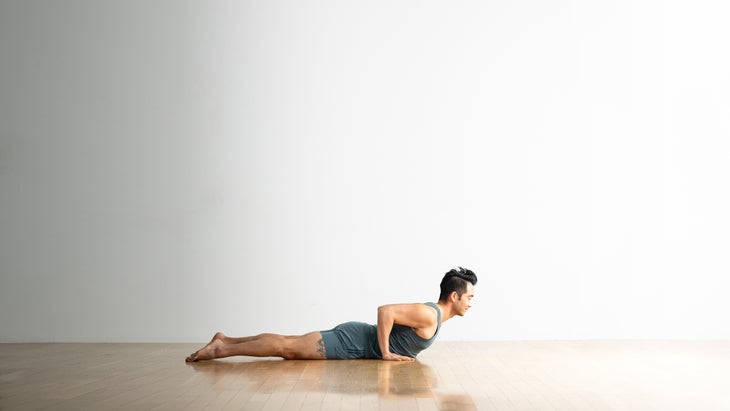
Bhujangasana (Cobra)
Why you need to adjust the pose: An invigorating backbend, Cobra Pose can compress your lower back—especially if your upper back is stiff. Instead, create the same shape but in a less-intense backbend by barely lifting your chest, a variation commonly known as “Baby Cobra.”
How to adjust the pose: Come onto your belly with your feet hip-distance apart or a little wider. Bring your hands beneath your shoulders. Press down through the tops of your feet, touching all your toenails against the mat, and draw your chest forward and slightly up as you keep your gaze forward and slightly down. Breathe.
Ustrasana (Camel Pose)
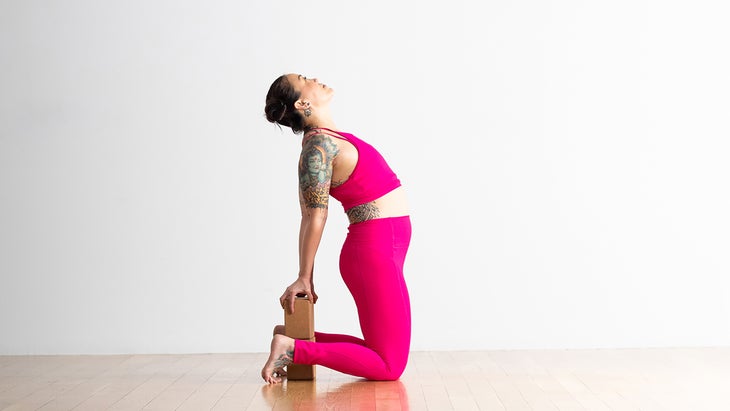
Why you need to adjust the pose: Even if you know that being able to touch your fingers to your toes isn’t the objective of the pose, it’s human nature to want to try. But this can create a tremendous amount of compression in your lumbar region. There are a number of ways to modify Ustrasana, including bringing your hands to your hips, tucking your toes under, placing blocks outside your ankles to rest your hands, or practicing the pose against a wall so you can press your pelvis into it. This variation is especially supportive.
How to adjust the pose: Kneel with your knees beneath your hips. Stack a couple of blocks in between your heels. Inhale and lift your chest, exhale and keep pressing your hips forward as you lean back and reach for the top block with your hands. Continue to bring your hips forward and lift your chest. Breathe.
Janu Sirsasana (Head-to-Knee Pose)
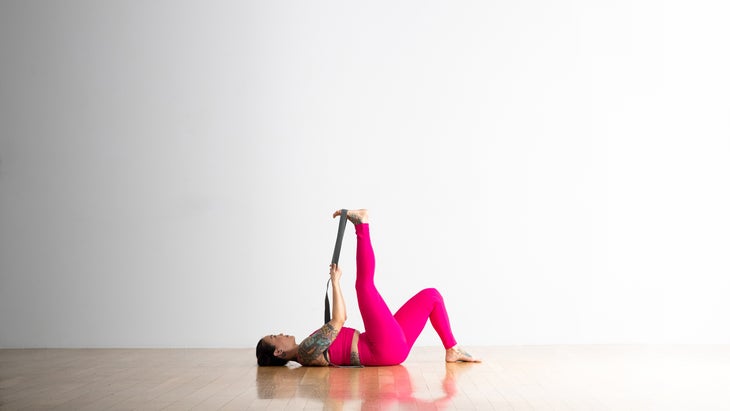
Why you need to adjust the pose: When sitting on a blanket in Janu Sirsasana isn’t enough to relieve your low back discomfort, Supta Padangusthasana (Reclining Hand-to-Big-Toe Pose) is an ideal alternative. It’s a safe and effective way to stretch the hamstrings while protecting your low back.
How to adjust the pose: Bend one knee and place that foot flat on the mat. Then lift the other leg, loop a strap or towel around the ball of your foot, and reach your heel toward the ceiling. Bend your knee as much as needed to be comfortable. Breathe.
Savasana (Corpse Pose)
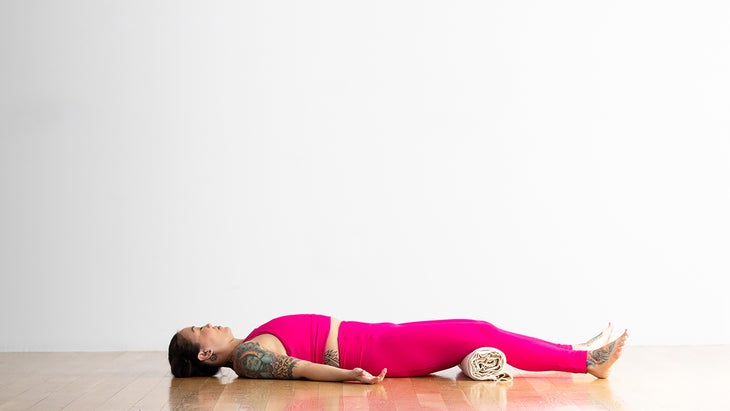
Why you need to adjust the pose: Lying flat with your legs extended can cause an intense stretch in your hip flexors and places stress on the lumbar region of your back.
How to adjust the pose: Slide a bolster, rolled blanket, or a couple of blocks beneath your knees and allow yourself to release.
This article has been updated. It was originally published on June 8, 2016.

