“], “filter”: { “nextExceptions”: “img, blockquote, div”, “nextContainsExceptions”: “img, blockquote, a.btn, a.o-button”} }”>
During my pregnancy, every morning brought on a new challenge for my body. I woke up feeling tight in areas that I never knew were restricted. I felt pain and stiffness from lying in a position for too long during sleep. I felt instability in my joints; a result of relaxin, the hormone secreted during pregnancy that relaxes the ligaments around the pelvis. Adding self-myofascial release (SMR) to my regular yoga practice brought me so much relief from pain and tension on a daily basis, and enhanced my mobility.
See also Beyond Foam Rolling: 4 Self-Myofascial Release Practices for Tension
What Is Self-Myofascial Release?
Self-myofascial release (SMR) is a practice that incorporates the use of specialized myofascial release balls to target the trigger points on the body, promoting a sense of mobility, release, and restructuring of fascia or connective tissue.
See also What You Need to Know About Fascia
Fascia is one continuous connection of tissue that exists in the body from head to toe. It connects, protects, fills space, communicates, and interrelates to everything within the body. Fascia also has a tendency to get restricted or wound tight, and in some cases may even cause pain in the body. This can have many adverse effects. Mobility is the key to maintaining optimal health in our tissues. Whether or not you are pregnant, SMR improves range of motion and circulation, relieves pain, and encourages relaxation.
Self-Myofascial Release Practice for Pregnancy
The following practice is for women in any stage of their pregnancy who have been cleared for exercise by their doctor or medical practitioner.
You will need: A blanket, a block, a bolster, and two tennis balls or myofascial release balls. The support of a wall is always encouraged. Please remember to stay hydrated throughout the practice.
1. Belly Breaths
Begin in a supportive seat using a bolster or blanket, allowing the knees to sit below the frontal hip bones. Guiding your awareness to your breath, observe the rise and fall of your belly. Notice any sensations around the belly, maybe even sensations from your baby. Take a few minutes to tune in. Allow the pelvis to get heavy and grounded into the support below you. Soften around the shoulders and neck.
Place one hand on the heart and one hand on the belly. Begin breathing with full inhalations and complete exhalations. Adding a deeper awareness around the belly, begin to take the navel toward the spine on an exhale count of 3 or 4. Try not to create any tension around the upper back, shoulders, or neck. Imagine you’re giving your baby a hug from deep within. Continue for 10-15 rounds.
See also Anatomy 101: How to Tap the Real Power of Your Breath
2. Cat/Cow
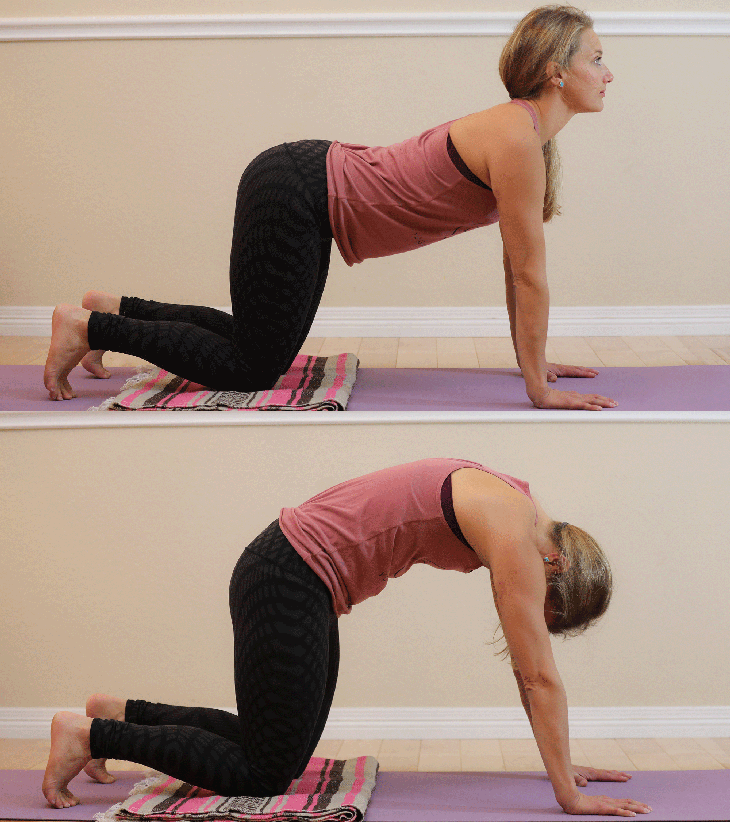
Move to all fours, with a blanket under the knees. Bring the knees slightly behind the hips to offer more room for the belly. Move through three rounds of Cat/Cow. Walk the arms forward to add movement through the torso and hips. Notice any areas that may feel tight or restricted.
See also Classic Asana, New Twist: 15 Traditional Poses + Variations
3. Broken Toe Pose
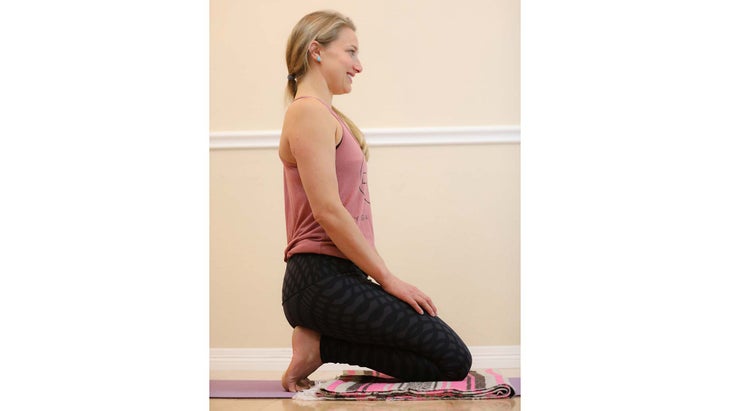
From all fours, tuck the toes into the mat. Begin to walk the hands back toward the knees, letting the hips sit back onto the heels. Modify the intensity by walking the hands forward. Come to a place where the breath can flow without resistance. Maintain the posture for a minute, to allow the plantar fascia of the foot to release.
See also The Importance of Your Feet in Yoga
4. Goddess Pose
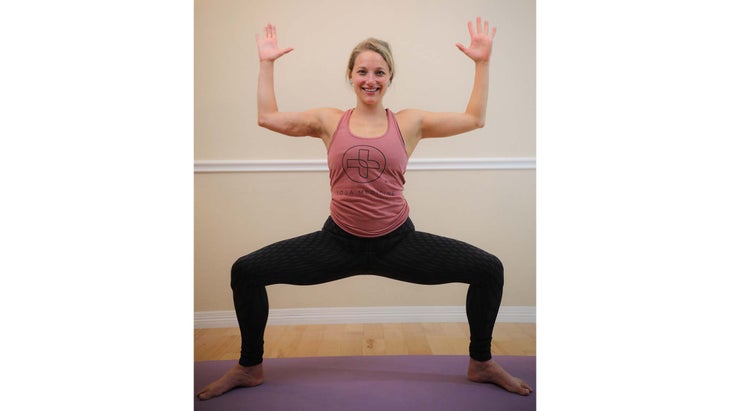
Transition to Goddess Pose (Utkata Konasana). Bringing the awareness into the pelvic floor, energetically begin to hug the sit bones toward one another, or Kegel. Take 5-10 deep breaths.
See also 10 “New” Yoga Poses Younger Than Yoga Journal
5. Release the feet.
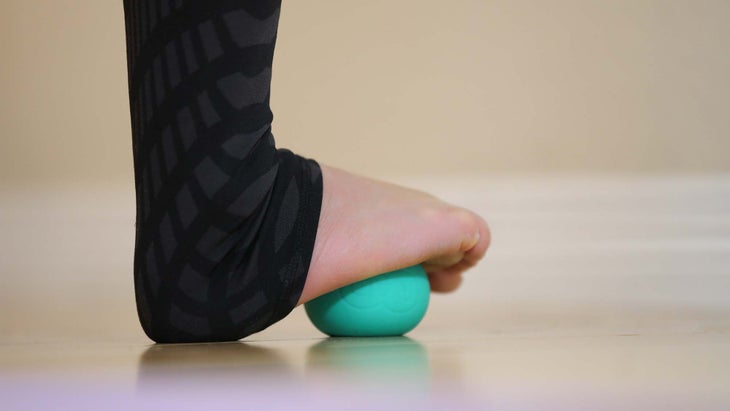
Grab your tennis balls to begin to release the feet, one foot at a time. Remember to incorporate deep breaths while rolling. Take a few minutes on each foot, working the heel, arch, and ball of the foot in a rolling or side to side motion.
6. Release the mid-back.
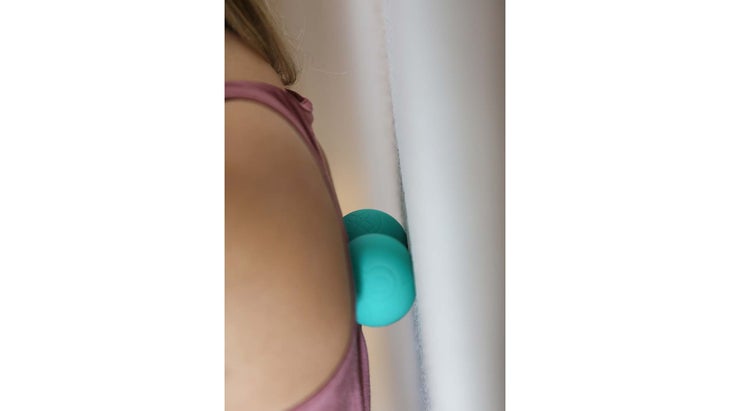
Placing both balls against the wall about one inch apart, begin to roll the space between the shoulders. Using the feet to support you, roll up and down and side to side in about a 4-5 inch radius. Roll this area for 10-15 full breaths.
See also Ease Lower Back + Shoulder Tension with Fascial Work
7. Release the upper back and shoulders.
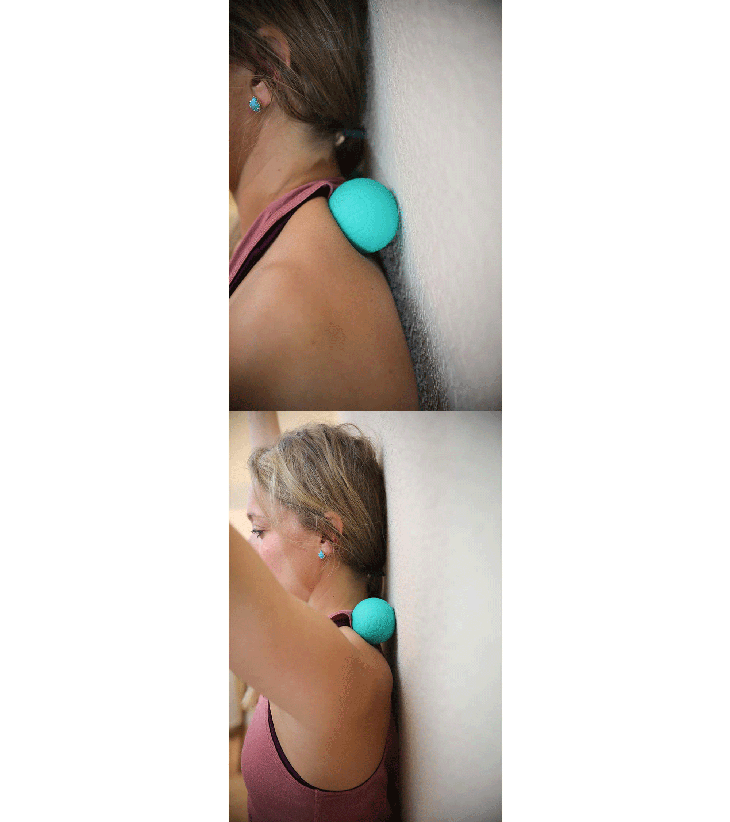
Remain against the wall. Place both balls at the top of the shoulders (into the trapezius muscle). Sink into the balls and move the arms up and back toward the wall. Pause anywhere that might offer a little more sensation. Take 5-10 deeps breaths. Remove one ball at a time and slowly come away from the wall, heading back to your mat.
See also What You Need to Know About Your Thoracic Spine
8. Wide-Angle Seated Forward Bend
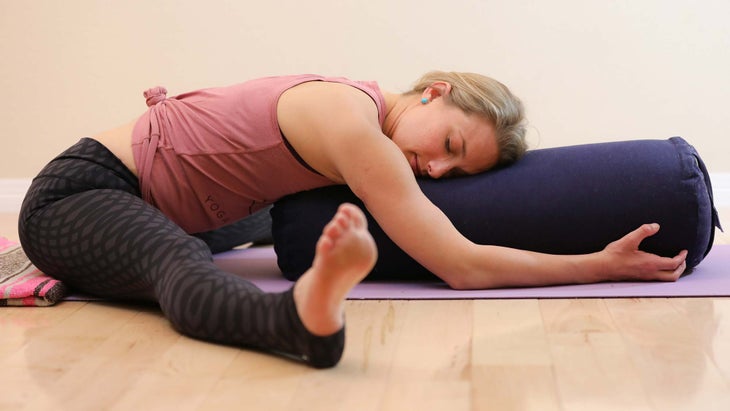
Placing a folded blanket under the pelvis, take the legs out wide for Wide-Angle Seated Forward Bend (Upavistha Konasa). Rest with the hands or chest on the bolster, letting the belly be free. Set the intention to breathe into spaciousness without resistance. Find a place of ease. Maintain this posture for 3-4 minutes.
See also 4-Step Bedtime Restorative Practice for Better Sleep
9. Release the calves and hamstrings.
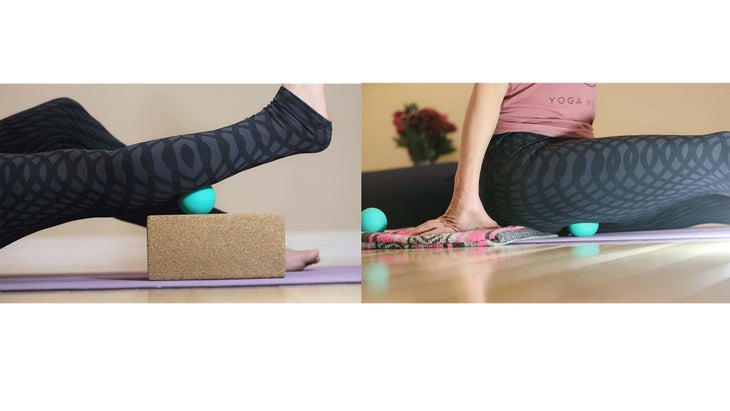
Place a ball on top of a block to release the calf in a rolling or rocking side-to-side motion. Stay for 10-20 full breaths. On the same leg, move the ball just in front of the ischial tuberosity (sit bone). Take the legs wide and slide the leg side to side or rock the hip forward and back. Move your hands into the floor behind you for less intensity, or move the hands in front of you for more intensity. If desired, move the ball another inch or two lower, toward the knee. Stay for 10-20 breaths per section. Notice the sensation in your leg and the difference between sides. Switch legs.
See also Get to Know Your Hamstrings
10. Hip stretch
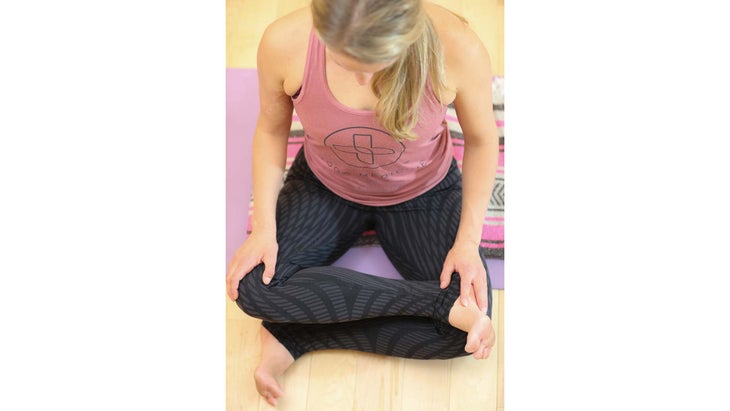
Stay seated, adding a blanket under your pelvis for support. Make your way into a cross-legged position of your choice (try Easy Pose or, if your practice allows, Fire Log Pose). Stay for 10-15 full breaths, switching sides. Set the intention for long-releasing exhalations.
See also A Yoga Sequence for Deep Hip Opening
11. Release the hips.
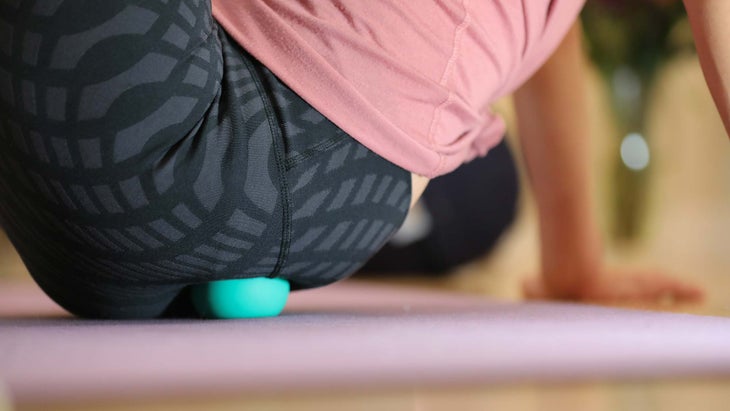
Place one of your balls under the left hip. Place the hands behind you and set the feet into the floor. Using the hands and feet as support, begin to massage the area around the gluteus maximus and sacrum. For deeper intensity if needed, cross the ankle over the knee. Take deep breaths. Repeat on the second side. Add a blanket over the ball for a gentler modification.
See also Anatomy 101: A Hip-Opening + Balancing Sequence
12. Release the glutes.
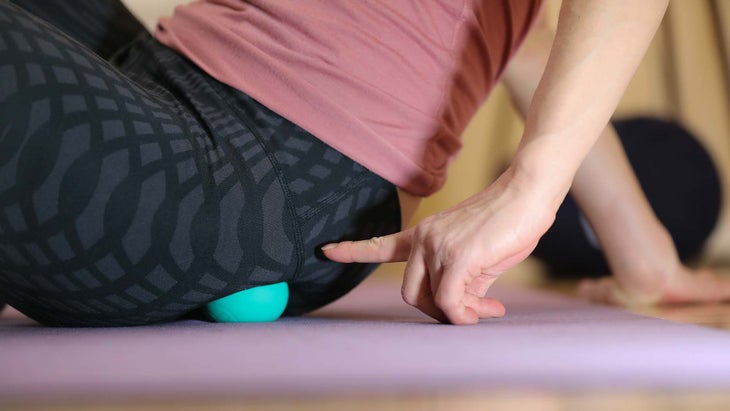
Finding the center of your gluteus maximus, move the ball one inch laterally (toward the outside). With both knees bent and feet into the floor, begin to windshield wipe the leg with the ball under it. You should feel the piriformis muscle contracting against the ball. Take 5-10 deep breaths, and maybe linger on any spots that feel more tender. Repeat on the other side.
See also Yoga Anatomy: Get to Know Your Glutes
13. Reclining Bound Angle Pose/Savasana
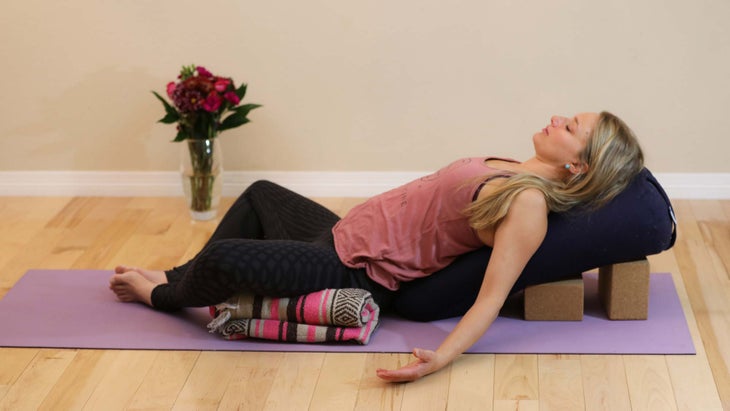
With your bolster and two blocks, set one block on the medium height and the other on the low height. Sit with your left hip right up next to the bolster. Slowly lower down on to your left side. Using your hands and feet to support you, gently arrive on your back. Your sacrum should be right up against the bolster. Support under the thighs with pillows, blocks, or blankets. Stay as long as you wish. If at any point you become dizzy, rock over to your left side. Take a few releasing breaths and gently ease your body into comfort and relaxation. Think or utter the following mantra: I release into spaciousness in my body. I am calm, I am at ease in my own body. I trust the connection to my own divine wisdom and to the creation of new life. Namaste.
See also Why Savasana Is Yoga Journal’s 2017 Pose of the Year
About Our Expert
Allie Geer is a prenatal certified yoga teacher based out of Boulder, Colorado, who is currently participating in Yoga Medicine’s 500/1,000 hour advanced teacher certification. She specializes in myofascial release and holds workshops around the Boulder area. For more information please visit her website: www.alliegeeryoga.com

