“], “filter”: { “nextExceptions”: “img, blockquote, div”, “nextContainsExceptions”: “img, blockquote, a.btn, a.o-button”} }”>
Whenever I announce in class that we’ll be doing a forward bend practice, I get a mixed response. The students who came to work hard groan audibly, assuming that class will be mellow. The students who want a gentle class show visible signs of relief. And those who have no idea what I am talking about look around to the others for guidance—only to be even more confused by the discernable reactions.
The benefits of forward bends are numerous, from lengthening the hamstrings and muscles along the spine to improving digestion and calming the nervous system. Yet, this category of poses never seems to inspire the same excitement and intrigue as backbends or inversions. I think many students mistakenly assume all forward bends are calming and, dare I say, boring.
However, there are several surprising (and challenging!) yoga postures that are categorized as forward bends. And they are anything but dull!
What is a forward bend?
Aanatomically speaking, forward bends encompass any pose in which your hip joint is in flexion—that is, where your femur, or thigh bone, is moving closer toward your body. A forward bend could include both legs in flexion, such as Pascimottanasana (Seated Forward Bend), which is what most people think of when they think of a forward bend. But the flexion could also take place in a single leg, like the standing leg in Parsvottanasana (Pyramid Pose or Intense Side Stretch).
I think poses in this category get a reputation of being calming, because, in a number of them, our heads are hanging down and our energy and awareness are drawn inward. But since we use anatomical neutral (think Tadasana or Mountain Pose) as our baseline when measuring range of motion, any time we flex one or both of the hips even a degree, we are in a forward bend. In other words, we do not need to fold in half to be in hip flexion. This is also why I prefer to say forward bend versus forward fold.
Another false assumption I have often heard is that forward bends are always practiced as counterposes to backbends. But poses, like humans, are complex. Some backbends are also forward bends, just as some forward bends are also backbends. This is especially apparent in Natarajasana (Lord of the Dance Pose).
In fact, deep hip flexion is also a requirement to be able to come into handstand, especially if you add “tuck jumps.” When you consider forward bends this way, you start to understand that a number of poses we might never have associated with forward bends can actually fall into this category. All pose categories can have a forward bend in them—even arm balances! (Especially arm balances.) Try not to judge a forward bend by its cover. The longer you practice, the more you learn that many postures can be categorized in multiple ways, depending on your personal focus. Therefore, you can truly make your practice whatever you need. The advanced practice becomes not about the pose, but your intention behind it.
Curious? Here are some surprising forward bends.
5 yoga poses you didn’t know were forward bends
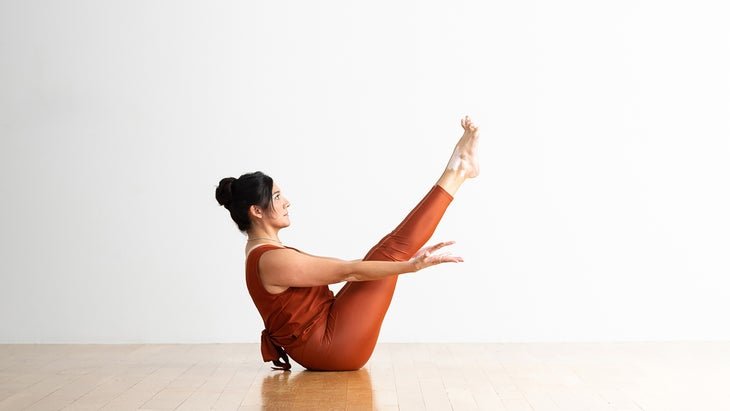
Paripurna Navasana (Boat Pose)
Teachers often treat boat pose as core work (which it most definitely is), but it is also a classic forward bend. Yet, I can confidently say I’ve never been cool or calm in that pose! Not only is this pose excellent at strengthening your hip flexors and spine, it also activates your determination, as you may find yourself up against your edge.
How to: Begin seated in Dandasana (Staff Pose) with both legs together. Bend your knees and place your feet on the floor. Bring your hands to the back of your thighs and lean back with your upper body, keeping your spine long, until you are balancing on your sit bones. Lift your feet off the floor, keeping your knees bent at first.
Stay here or slowly start to straighten your legs. Reach your arms forward alongside your thighs, palms facing one another. Ensure the back of your neck stays long by gazing straight ahead to your toes. Stay here for 5 breaths. Return to the starting position of holding the back of your legs and place your feet on the floor. Repeat once.
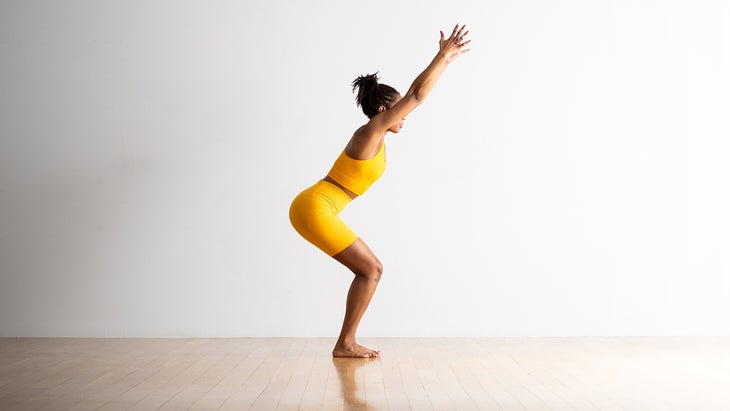
Parvritta Utkatasana (Twisting Chair)
Believe it or not, pretty much any closed twist (twists where you compress your torso, usually by crossing your arm over your leg, to deepen the rotation) must have a forward bend in it. In order to twist our deepest, and, especially, if we are going to close the twist by crossing an arm over a leg, we must first fold in half. It is amazing how much more deeply the spine can rotate after you have folded.
How to: From Utkatasana, bring your hands into prayer at the center of your chest and take a long inhale. Exhale and bend forward toward your top thighs, so that your torso is parallel to the floor. Bring your right hand to your right outer hip and use your hand to pull your hip toward the back of your space as you inhale your chest toward the front. Exhale, twist your spine to the right, and hook your left elbow over your right thigh and bring your palms together. Once in the pose, inhale first to lengthen through the spine, then exhale and press your palms together to twist further. Do this for 5 breaths. Inhale back to Chair Pose and exhale to stand up. Repeat on the second side.
(If you are unable to get your elbow outside of your leg, take your feet hip-width apart and try placing your left elbow on the inside of your left thigh instead. It is generally suggested that pregnant women far into their second and third trimesters should avoid intense twists. If this applies to you, try this option.)
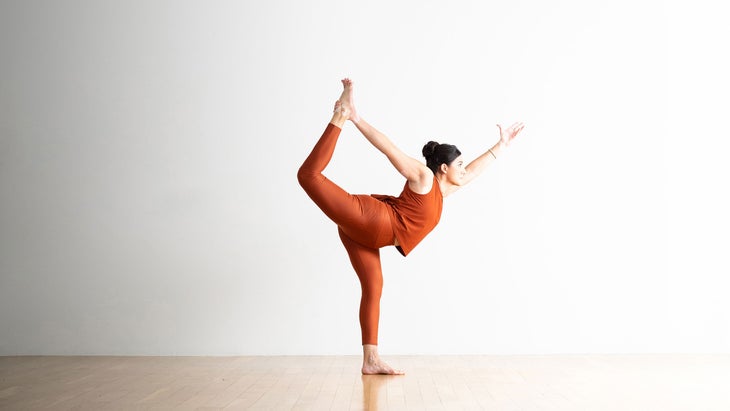
Natarajasana (King Dancer Pose)
In Dancer, the hip on your standing leg side must be in deep flexion in order to create even more extension in the spine and lifted leg.
How to: Stand at the top of your mat in Tadasana (Mountain Pose). Bring your left hand into a half prayer position at the center of your chest. Bend your right knee and keep your knees together as you bring your heel toward your bum. Reach your right hand behind you and hold your outer foot (or, if it’s more accessible to you, grab your inner foot). Inhale and, as you exhale, begin to tip your pelvis forward over your left thigh so that your chest and lifted thigh come toward parallel to the floor. Focus your gaze either on the floor ahead of you or straight ahead.
On your next breath, begin to strongly press your right foot away from you into your right hand and straighten your right arm away from your body. At the same time, intensify your backbend by leveraging the lift of your back leg against the lift of your chest to create an even bigger arch. If you feel well-balanced, begin to reach your left arm forward in line with your left ear, palm facing inward. Keep your neck long by lifting through your chest and crown of your head. Breathe.
Slowly come out, lifting your torso upright and bringing your right knee in line with your left. Release your lifted foot and stand on both feet for a moment to ground. Repeat on the other side.
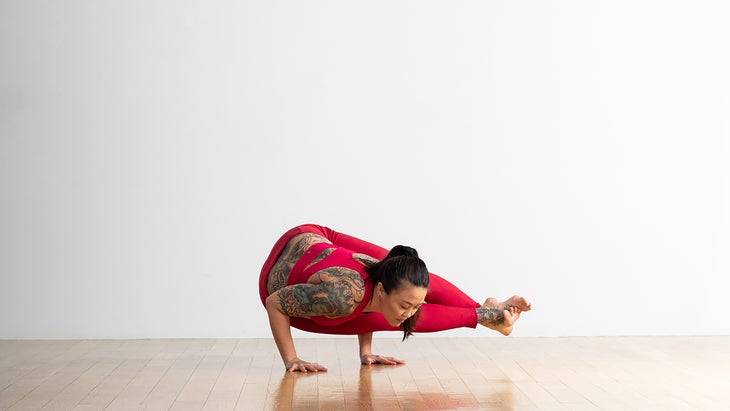
Astavakrasana (Eight-Angle Pose)
Forward bend arm balances require great hamstring flexibility as well as deep hip flexion in order to get the leg up and over the arm as high as possible. What I especially love about Astavakrsana is that it is actually one of the more accessible arm balances, despite its appearance of being one of the more complex. This helps to build confidence in addition to the physical benefits mentioned above.
How to: Sit on your mat in Dandasana (Staff Pose) facing the long side of the mat. Pull your left knee toward your chest and use your left hand to grab the outside of your foot (like an upright Happy Baby) and take a few breaths, pulling your thigh back alongside your body. Bring your right hand over to hold your foot and begin to snuggle your left shoulder as far underneath your left leg as you can. Squeeze your left leg against your shoulder like a little nutcracker, so that when you let go, it stays. Place your palms on the ground a few inches ahead of your hips and begin to lean forward, keeping your bum on the floor.
Next, lift your right leg, bend your knee, and cross your right ankle on top of your left. Pause here and continue to squeeze your inner thighs toward your midline, especially your left leg as it is now holding your legs up. Your knees will be slightly bent. You may stay here.
Otherwise, continue to lean forward with your upper body, pressing your palms strongly into the floor. Eventually, your bum will lift away from the ground. Once that occurs, squeeze your inner thighs toward one another, straightening your legs to your left. Reach your chest forward and lift your shoulder heads away from the earth. Your gaze, or drishti, will be a few inches ahead of you on the floor, so your neck remains long. Once balanced, try to hold for 5 full breaths.
Come out as you came in, slowly bending your knees and lowering your bum back to the floor. Untangle your left leg from around your upper arm and return to Dandasana for a breath or two to even out before trying on your other side.
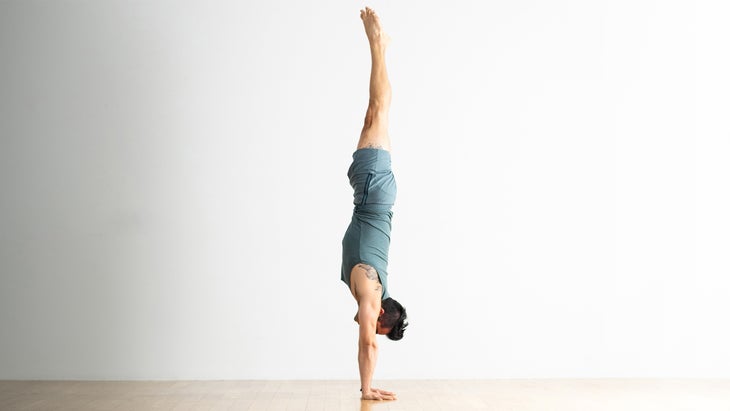
Handstand Hop-Ups With Tuck and Pike
Little do people who choose my inversions classes over my forward bend ones know, we will be doing lots of forward bending in these as well! I will be fully honest, in the two plus decades I have been practicing, I have never successfully gotten my heels over my hips unassisted. But that has never stopped me from trying! The benefits of these donkey kicks are not just restricted to transitioning us to Handstand. They also teach us that sometimes we must pull in toward ourselves in order to powerfully leap forward (or up, in this case!).
How to: Begin in Downward-Facing Dog with your feet a little closer to your hands than usual. This helps bring energy into your legs, which are the engines for your hops. As you inhale, press your hips way back, getting as much length as you can through your spine. As As you exhale, deeply bend your knees and tuck your thighs toward your chest (almost as though you were going into Child’s Pose). At the end of your breath (that pause in between inhaling or exhaling), think to yourself, “bum over shoulders,” and hop. Rather than thinking of jumping forward to the top of the mat, I find it most helpful to imagine you are jumping up to the ceiling or as if you are trying to kick your heels to your bum.
Land back in your Downward-Facing Dog and take a breath before repeating a few more times. For those of you who can balance, pause in the pike position with your knees bent and your thighs parallel to the floor before either coming into Handstand or returning to the ground. Try at least 3 rounds.

