“], “filter”: { “nextExceptions”: “img, blockquote, div”, “nextContainsExceptions”: “img, blockquote, a.btn, a.o-button”} }”>
Hip openers offer almost unparalleled benefits—not least of which is that they feel so good. Flexible hips are integral to almost every yoga posture—standing in Mountain, sitting in Lotus, and finding stability in any Warrior variation. They’re also essential to your ability to walk, run, sit, bend, and even pick up something from the floor. This is why it’s critical to keep the hip joints supple and limber, and the surrounding muscles strong.
As a ball-and-socket joint, the hip joint allows your leg to move in all directions. From a standing position, your hips help you extend your leg into Utthita Hasta Padangusthasana (Extended Hand-to-Big-Toe Pose). Rotating the head of the femur in the hip socket allows you to cross your ankle over your opposite thigh in Eka Pada Utkatasana (One-Legged Chair Pose). The joint also lets you extend your leg back and stretch the front of your thigh in Natarajasana (Lord of the Dance Pose), and to bend forward and extend your back leg in Urdhva Prasarita Ekapadasana (Standing Splits).
This range of movement is the result of the work of muscles, ligaments, and tendons—some deep within the body—that pull, push, and support your leg bones. Maintaining this range of motion is key to a strong asana practice. Enter these hip openers, which will release tension in the hips and keep them moving smoothly.
7 yoga poses to ease tight hips
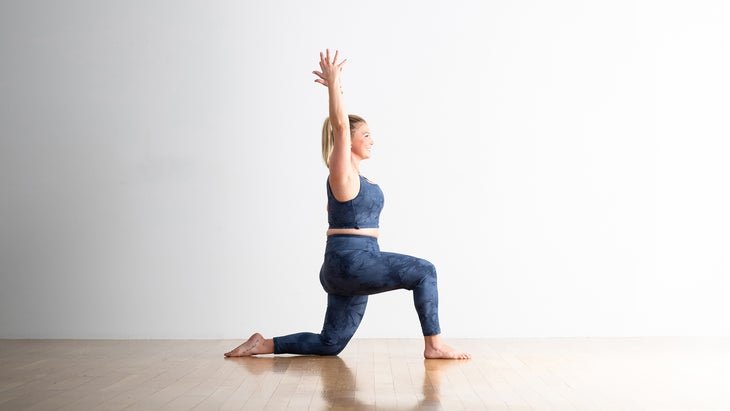
Anjaneyasana (Low Lunge)
- From Adho Mukha Svanasana (Downward-Facing Dog Pose), step your right foot forward between your hands, aligning your right knee over your right heel.
- Lower your left knee and the top of your left foot to the floor. Keeping both hip points parallel with the front of the mat, slide your left foot back until you feel a stretch in your left front thigh and groin.
- Inhale, lift your torso and raise your arms overhead. When this joint moves smoothly, your practice and everyday function improve.
- Draw your tailbone down toward the floor and lift your pubic bone toward your navel to keep length along your spine.
- Hold for a minute. To exit, lower your hands to the floor and turn your back toes under. Exhale to step back to Downward-Facing Dog Pose. Repeat, on the other side.
To improve balance, practice this pose facing a wall. Press the toes of the front foot against the wall and walk your fingertips up the wall.
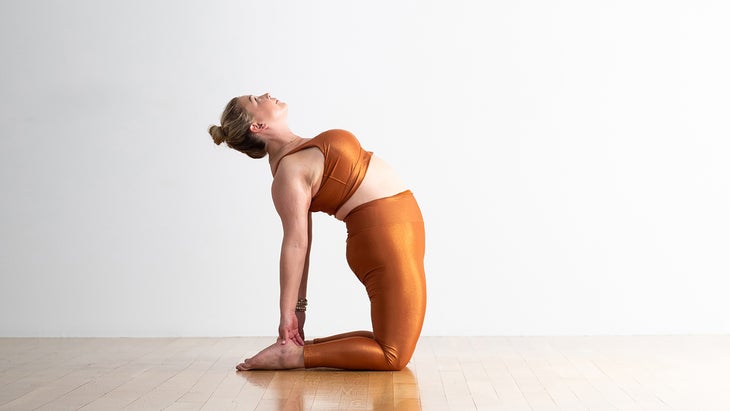
Ustrasana (Camel Pose)
- Come to your knees with your legs hip-width apart. Align your hips over your knees and rotate your thighs inward.
- Inhale. Lift your sternum and arch your back, drawing your shoulders down and back. Reach your hands toward your heels or blocks placed next to each ankle.
- Gently allow your head and neck to extend backward. Be mindful not to compress the back of your neck.
- Stay in this pose for up to one minute. To exit, bring your chin to your chest and place your hands on your hips with your thumbs on your sacrum. Engage your lower belly and use your hands to support your lower back as you come slowly back up to your original kneeling position.
To keep length along your spine, reach your tailbone toward your knees, creating space between your lower vertebrae. Tuck your chin slightly to keep space in the back of your neck.
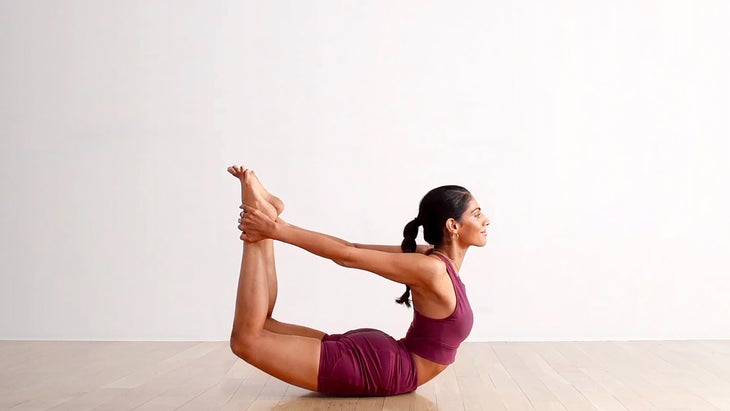
Dhanurasana (Bow Pose)
- Lie down on your mat, belly down.
- Bend both knees and bring your feet toward your buttocks.
- On an inhalation, start to lift your head, shoulders, and chest.
- Reach back to grasp the outside of your feet or ankles. Rotate your shoulders back and try to move your elbows toward each other.
- Exhale and lengthen along your tailbone. Holding your ankles firmly, press them away from your body to create resistance.
- Stay lifted for 5 breaths. To exit the pose, release your ankles. Lower your legs and torso back to the mat.
If it’s difficult to reach your ankles, use a strap around the tops of your feet. You can place a folded blanket under your pelvis for padding, or a rolled-up blanket under your thighs to give your legs an upward boost.
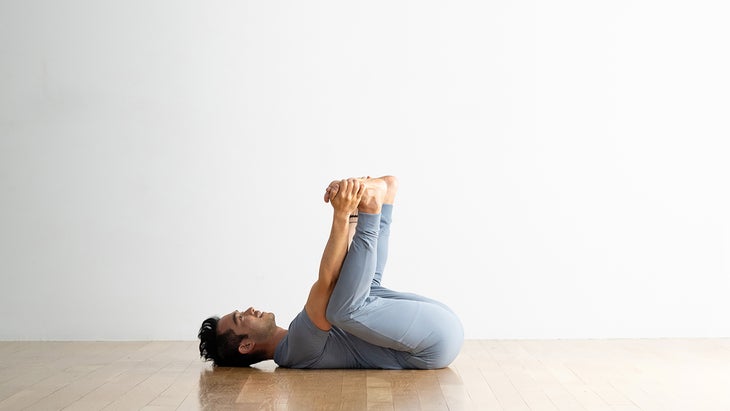
Ananda Balasana (Happy Baby Pose)
- Lie on your back. Bend your knees and bring them toward your torso.
- Grasp the outer edge of each foot.
- Open your knees slightly wider than your torso, then bring them in toward your armpits.
- Try to position your ankles over your knees, so your shins are perpendicular to the floor. Flex your feet.
- Gently push your feet up into your hands as you pull your hands down to create resistance.
If you can’t easily reach your feet with your hands, loop a strap around the middle of each arch.
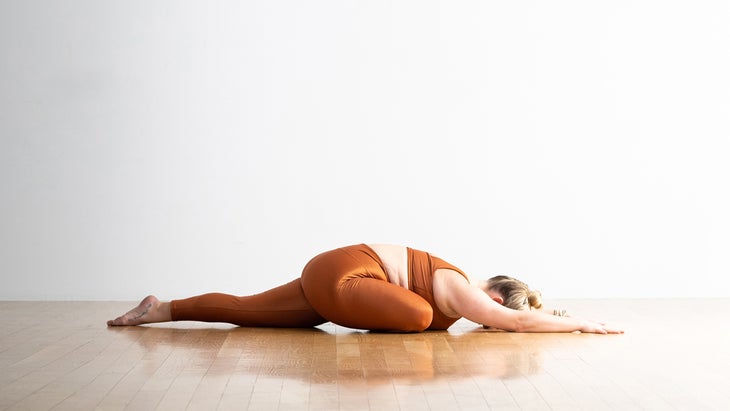
Eka Pada Rajakapotasana (One-Legged King Pigeon Pose)
- Come into Tabletop with your hands shoulder-distance apart.
- Slide your right knee forward and angle your shin so your right foot is in front of your left knee and the outside of your right shin is on the floor.
- Extend your left leg straight back, releasing your shin, knee, thigh and the top of your foot to the mat.
- Position your right foot and shin just in front of your left hip. Flex your right foot. Square your hips.
- Place your hands on the mat in front of you and press away from the floor to bring your torso upright. Or, walk your hands away from you and release your forehead to the floor.
- Hold for a minute or more. To exit the pose, press away from your mat and lift your body slightly to rotate your right knee gently into Tabletop. Tuck your left toes, lift the left leg, and bring the left knee next to the right.
If your right hip doesn’t rest on the floor, place a blanket, pillow, or bolster under it to support your body and keep it from shifting to one side.
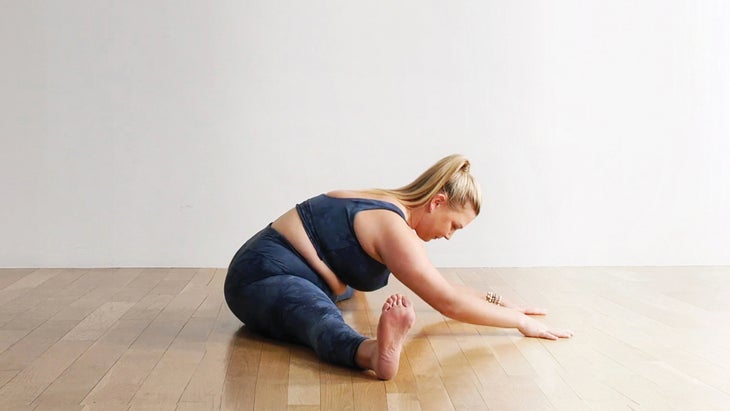
Upavistha Konasana (Wide-Angle Seated Forward Bend)
- Sit in Dandasana (Staff Pose) with your legs straight in front of you.
- Separate your feet and open your legs out wide to the sides.
- Flex your feet and point your toes up. Root down with your thighs so your knees and quadriceps face the ceiling.
- Inhale and lengthen your spine. Exhale and hinge at your hips, walking your hands forward and bringing your torso forward and down between your legs.
- Keep your back straight; avoid curving your spine.
- To exit the pose, walk your hands back toward your body, sit up, and bring your legs together.
You can do this pose with your knees bent or supported by using rolled-up blankets.
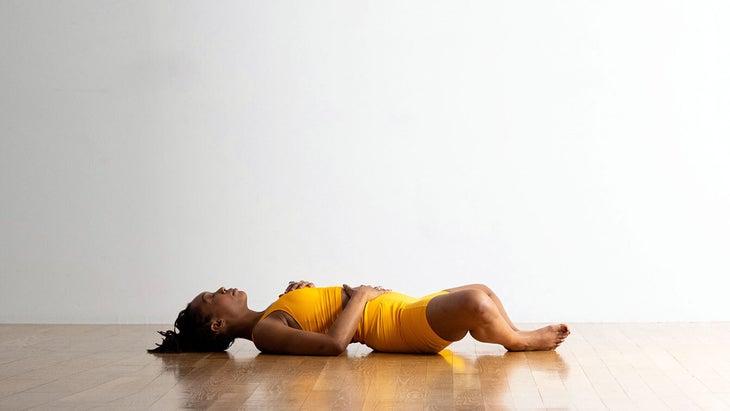
Supta Baddha Konasana (Reclining Bound Angle Pose)
- Lie on your back.
- Bend your knees and place your feet on the floor with your big toes touching.
- Allow your knees to open away from each other and fall out to the sides toward the floor.
- Press the soles of your feet together. Move your heels closer to or farther from your groin until you find a comfortable stretch.
- Place your hands on your thighs, stomach, or heart, or extend your arms on the floor away from the sides of your torso, palms up.
- Rest in this pose for one minute or more. To come out, use your hands under your knees to press your thighs together. Roll to one side and push yourself away from the floor.
Don’t force your knees to the floor. Support them by placing blankets, bolsters, or pillows under them.

