“], “filter”: { “nextExceptions”: “img, blockquote, div”, “nextContainsExceptions”: “img, blockquote, a.btn, a.o-button”} }”>
The term “hip opener” is used a lot in yoga. It describes any pose with external rotation of the hip joints as its primary focus. Think of the movement at the hips when you turn your feet out in a Charlie Chaplin stance. You see this in Virabhadrasana II (Warrior 2), Baddha Konasana (Bound Angle Pose), and Sukhasana (Easy Pose), among other poses.
I prefer to think of these “hip opener” poses as “hip external rotators” since that’s the specific movement emphasized (although you could think of them as “Charlie Chaplin poses”). The pose with perhaps the most intense external rotation is Eka Pada Rajakapotasana (One-Legged King Pigeon Pose). In the traditional version of this pose, your front knee is bent so your shin is either parallel or at an angle to the short edge of the mat and your back leg extends straight behind you. This stretches the buttock and inner thigh of your front leg as well as the hip flexors of your back leg.
However, this posture can be challenging, particularly those of us who experience tightness in our hips or are working with a knee or ankle injury. Practicing any of the following versions allows you to explore many of the same actions and benefits of the asana, including developing our focus and concentration.
5 ways to practice Pigeon Pose
Preparation
First practice Virabhadrasana II (Warrior 2) Pose, Baddha Konasana (Bound Angle Pose), and Sukhasana (Easy Pose) to prepare your front hip. Supta Virasana (Reclining Hero Pose) and Anjaneyasana (Low Lunge) help warm up your back hip.
1. Traditional Pigeon Pose
From Tabletop or Adho Mukha Svanasana (Downward-Facing Dog Pose), step your right foot behind your right wrist. Then inch the outer edge of your right foot behind your left wrist and lower your right knee to the mat behind your right hand. Step or slide your left foot further back so your left leg is straight behind you as you lower your pelvis toward the mat.
Tip: There is no “one size fits all” when it comes to the angle of the front knee or position of the front foot. Explore and find the most comfortable position for your body. Angling your shin closer to the opposite hip reduces the amount of external rotation required in your right hip. Actively press the edge of your front foot into the mat. You can choose to keep your torso upright, supporting the weight of your upper body with your arms, or for a deeper stretch in the front hip, you can fold toward your front leg.

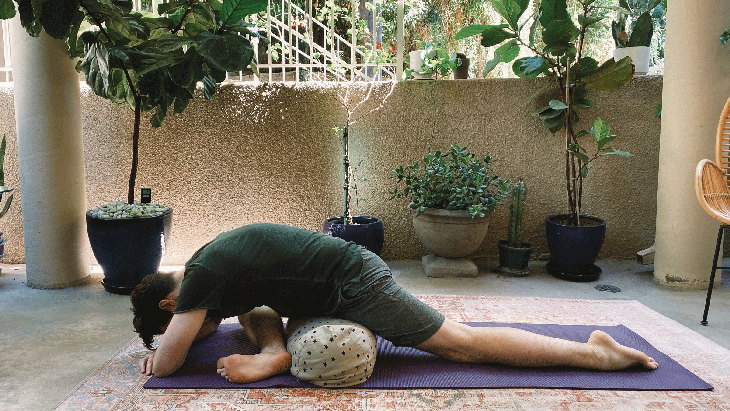
2. Pigeon Pose with a bolster
Lifting and supporting your pelvis reduces the amount of hip external rotation required of your hip and decreases the intensity of the stretch in your back thigh. From Downward-Facing Dog, place a bolster horizontally across the mat a couple of feet behind your hands. Step your right leg forward over and in front of the bolster and lower your right thigh or your glutes onto the bolster. Again, you can keep your torso upright and support your upper body with your arms or fold toward your front leg for a deeper stretch in your front hip.

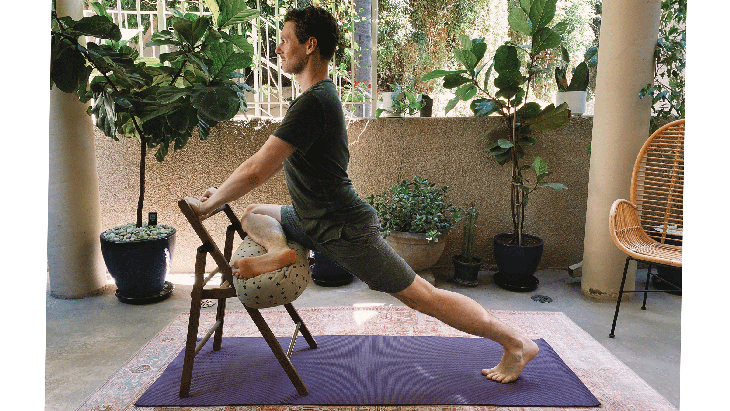
3. Pigeon Pose with a chair
Place a bolster horizontally across the seat of a chair and come into Downward-Facing Dog with your hands on the edge of the seat. Lift your right foot and place the outer edge of your foot on the left side of the bolster and sink your right hip toward the bolster. If you want to increase the intensity of the stretch, you can shuffle your left foot further back so you can lower the back of your front thigh onto the bolster.

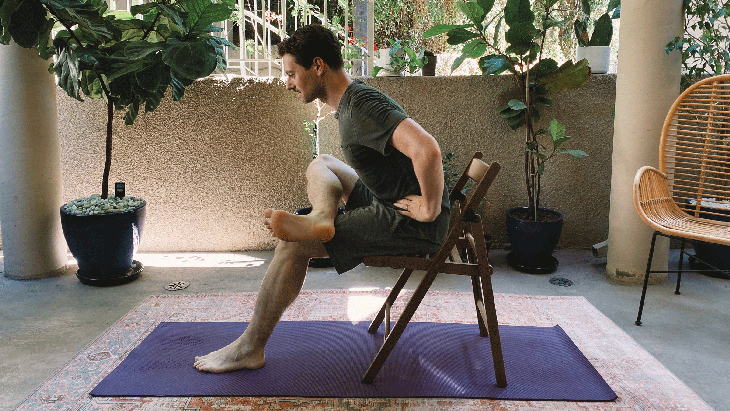
4. Seated Pigeon Pose
Sit toward the edge of a chair and position your feet slightly in front of your knees, hip-distance apart. Cross your right ankle over your left thigh. Keep your right foot and ankle active by spreading your toes and pressing through the big toe edge of your foot to flex your foot. The closer you bring your right heel toward your left hip, the greater the stretch. Stay here or place your hands on your hips and begin to slowly fold forward toward your right thigh.
Tip
You can also do a version of this seated on your mat with your left heel on the mat and your hands behind you for support. Again, the closer you bring your left heel toward you, the deeper the stretch.

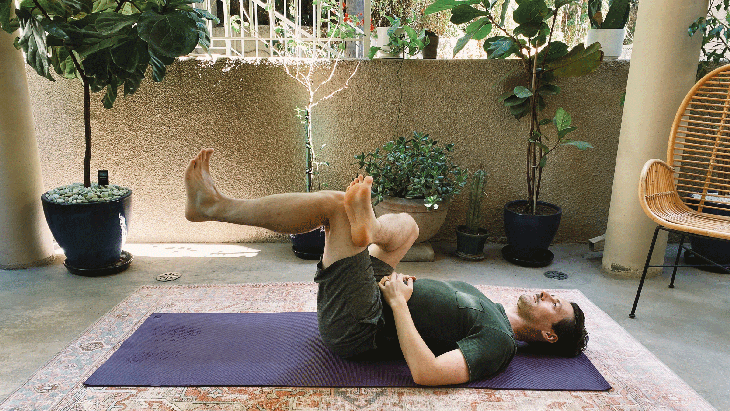
5. Reclining Pigeon Pose
Come onto your back, bend your knees, and place your feet flat on the mat a couple of feet in front of your hips. Cross your right ankle over your left thigh. Keep your right foot and ankle active by spreading your toes and pressing through the big toe side of your foot. Either rest your arms at your sides or interlace your fingers behind your left thigh and pull your leg toward you a comfortable amount. To deepen the stretch in your right hip, either step your left foot closer to you or pull your left thigh comfortably even closer.
About our contributor
Andrew McGonigle has studied anatomy for more than 20 years. After initially studying to become a doctor, he moved away from Western medicine to become a yoga and anatomy teacher. He shares his knowledge of the body and the ways it moves in yoga teacher training courses throughout the world and leads his own Yoga Anatomy Online Course. His second book, The Physiology of Yoga, was published in June 2022. To learn more about Andrew, check out doctor-yogi.com or follow him on Instagram @doctoryogi.
